
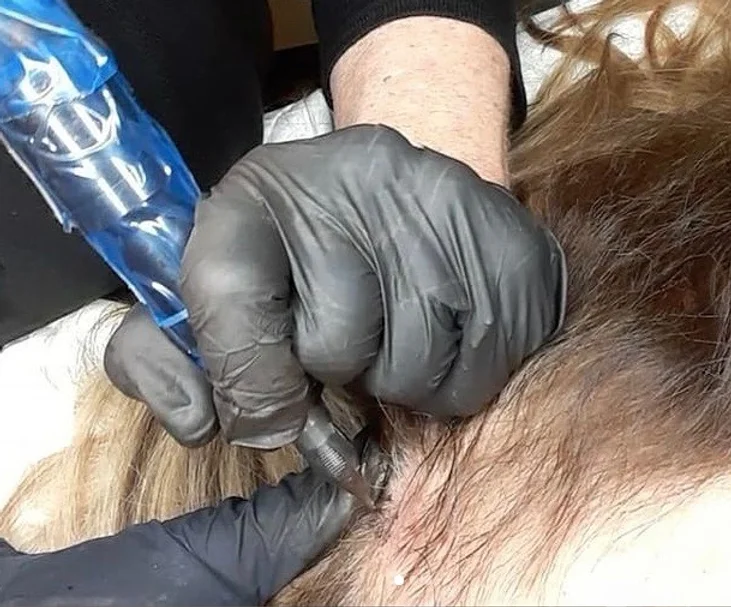
I begin with a consultation to discuss your hair loss, goals, skin type, expectations, medical history, and likely sessions. We then design and approve your hairline or density plan, cleanse the scalp, and apply pigment gradually with a specialized SMP machine. I finish by explaining aftercare and what to expect during healing.
If you’ve been researching scalp micropigmentation and you’re still not quite sure what actually happens when you sit down in the chair, you’re not alone. Most of my clients come in with a mix of excitement and nerves, and the biggest thing that helps them relax is simply knowing what to expect.
So let me walk you through the entire SMP session process, from the moment you walk into The Micropigment Studio to the moment you walk out looking like a new person.
First Things First: The Pre-Session Consultation
Before any pigment touches your scalp, we sit down and talk. This consultation is one of the most important parts of the entire process. I want to understand your hair loss history, your lifestyle, the look you’re going for, and your skin type, because all of these factors directly influence how I approach your treatment.
During this conversation, we’ll look at reference photos, discuss realistic expectations, and I’ll explain exactly how many sessions you’re likely to need. Most clients require two to three sessions to achieve a fully layered, natural-looking result. This is not a one-and-done procedure, and being upfront about that from the start is something I take seriously.
We’ll also go over your medical history using our intake questionnaire, which helps me identify any contraindications or skin sensitivities that could affect the outcome or healing process.
Hairline Design and Scalp Mapping
Once we’re aligned on the goal, the design phase begins. For clients addressing hair loss or a receding hairline, this step is where the transformation really starts to take shape. I use a fine skin-safe marker to sketch out the proposed hairline directly on your scalp, taking into account your facial structure, age, and personal preference.

This is a collaborative process. I’ll ask you to look in the mirror, give feedback, and we’ll adjust until the design feels completely right for you. A hairline that looks too low or too perfectly straight will look unnatural, so I always aim for something that complements your face and suits where you are in life right now.
For clients with diffuse thinning or alopecia, the mapping process focuses more on density distribution and blending rather than a defined hairline edge.
Skin Preparation and Workspace Setup
Before I begin applying pigment, I clean and prep the treatment area. This typically involves a gentle cleanse of the scalp to remove any oils, product residue, or environmental debris that could interfere with pigment retention.
My workstation is fully sanitized between every client, and I use single-use, sterile needle cartridges for every session. Hygiene and safety standards are non-negotiable in my studio, and I follow bloodborne pathogen protocols that I’ve maintained throughout my entire career in micropigmentation.
The SMP Application Process: What It Actually Feels Like
Here’s where people tend to have the most questions. The actual pigment application involves a specialized SMP machine that deposits pigment into the upper dermal layer of the scalp using fine needle configurations. The goal is to replicate the appearance of natural hair follicles, creating tiny, precise impressions that mimic the look of closely cropped hair or add the illusion of density.
The sensation is often described as a light scratching or mild stinging. Most clients are surprised by how manageable it is. The level of discomfort varies depending on the area being treated. The crown and mid-scalp tend to be less sensitive, while areas closer to the temples or the back of the head near the occipital bone can feel more intense. I always work at your pace and check in with you throughout the session.
Sessions typically run between two and four hours depending on the size of the treatment area and the complexity of the design. During this time, I work in a methodical pattern, building up the treatment area gradually rather than saturating any one zone too quickly. This layered approach is what creates a result that looks dimensional and realistic, not flat or artificial.
Pigment Selection and Color Matching
One of the most technically demanding parts of the process is getting the pigment color right. I mix and adjust shades to match your existing hair colour, skin tone, and undertones. This is not a one-size-fits-all ink situation. A colour that looks perfect on one client could look completely wrong on another.
I draw on decades of experience in colour theory from my background in professional makeup artistry, working with clients in print, film, and television before I ever picked up an SMP machine. That foundation has a direct, practical impact on the quality of colour matching I’m able to achieve for my SMP clients today.
Between Sessions: What Happens Next
After your first session, I’ll walk you through your aftercare instructions in detail. The first few days are critical for pigment retention. You’ll need to keep the scalp dry, avoid sweating heavily, and stay out of the sun. There will be some redness immediately after the session, and the pigment will appear darker than the final healed result. That’s completely normal.

The skin needs time to settle. Over the following days, the initial intensity fades and the pigment softens into a more natural tone. This is why multiple sessions are necessary. Session two allows me to assess how your skin has retained the pigment, fill in any areas that faded unevenly, and begin building additional depth and density.
Most clients complete their full treatment plan within four to eight weeks, with sessions spaced roughly one to two weeks apart to allow proper healing between visits.
The Final Session and Long-Term Results
The final session is where everything comes together. By this point, I can see clearly how your skin has responded, what areas need refining, and what the finished result will look like once fully healed. I pay close attention to the outer edges of the hairline, ensuring the transition between the treatment area and natural skin looks seamless and undetectable.
Once healed, SMP is a low-maintenance solution. Most clients return for a touch-up every three to five years depending on skin type, lifestyle, and sun exposure. With proper care, the results hold up remarkably well and continue to look natural over time.
Why the Process Matters as Much as the Result
I’ve been doing micropigmentation work in one form or another since 1989, and the one thing that has never changed is this: the process IS the result. How carefully I design the hairline, how precisely I match the colour, how methodically I layer the pigment, and how thoroughly I prep and care for your skin throughout, all of these steps determine whether you leave with something that genuinely changes your confidence or something that just looks like a scalp tattoo.
At The Micropigment Studio in Willow Glen, San Jose, every session is approached with that same level of care and intention. I don’t rush, I don’t cut corners, and I treat every client’s scalp as the unique canvas it is. If you’re ready to take the next step, I’d love to start with a consultation and show you exactly what’s possible.
Frequently Asked Questions
Q1: How long does an SMP session take?
The length of an SMP session depends on the size of the treatment area and the complexity of what we’re trying to achieve. For most clients, a single session runs between two and four hours. A full scalp treatment addressing significant hair loss will naturally take longer than a session focused on adding density to a specific thinning zone. I never rush through a session. Precision takes time, and I’d rather spend an extra thirty minutes getting the hairline exactly right than move quickly and have to correct it later. When you book with me, I always build enough time into the appointment so there’s no pressure to finish before the work is actually done.
Q2: Is SMP painful?
Most clients describe the sensation as mild to moderate, somewhere between a light scratching and a subtle stinging feeling. It’s generally much more comfortable than people expect going in. That said, pain tolerance varies from person to person, and some areas of the scalp are more sensitive than others. The temples and the back of the head near the base of the skull tend to be the most sensitive spots. The crown and the top of the scalp are typically much easier to tolerate. I check in with clients throughout the session and always work at a pace that feels manageable. If you need a short break at any point, we take one. Your comfort matters to me, and there’s no reason for the experience to be unpleasant.
Q3: How many SMP sessions will I need?
Most clients need two to three sessions to achieve a complete, fully layered result. The first session lays the foundational layer of pigment and establishes the overall design. The second session builds density, corrects any uneven fading, and begins to add the depth that makes the result look truly realistic. A third session, when needed, is typically used for fine-tuning and refinement. The number of sessions required depends on your skin type, the degree of hair loss being addressed, and how well your skin retains pigment during healing. I assess each client individually and won’t add sessions unnecessarily. My goal is always to get you the best possible result in the most efficient way.
Q4: What should I do to prepare for my SMP appointment?
There are a few things you can do before your appointment to help ensure the best possible outcome. Arrive with a clean scalp, free of any styling products, oils, or sunscreen. If you have existing hair, shave it down as close as possible beforehand since this helps me assess the scalp clearly and match the pigment to the correct shade. Avoid alcohol for at least 24 hours before your session, as it can thin the blood and affect how the skin responds during treatment. Stay well hydrated in the days leading up to your appointment, as hydrated skin takes pigment more evenly. Avoid sunburning the scalp in the week prior, and if you take blood thinners or have any medical concerns, please fill out the medical questionnaire before your visit so we can discuss it in advance.
Q5: Will the results look natural?
When SMP is done correctly, it is genuinely difficult to detect. The goal is never to create something that looks like a tattoo on the scalp. The goal is to replicate the appearance of real hair follicles so convincingly that even people who know you well won’t be able to pinpoint exactly what changed. They’ll just notice that you look sharper, more rested, and more confident. Achieving that requires careful hairline design tailored to your face, precise color matching to your skin and hair tone, and a layered application technique that builds dimension rather than flat coverage. With over three decades of experience in micropigmentation and color work, this level of precision and naturalism is what I focus on with every single client.
Q6: How long do SMP results last?
SMP is considered a semi-permanent procedure. Once fully healed, most clients enjoy results that hold up well for three to five years before a touch-up is needed. Over time, the pigment gradually lightens as the skin naturally exfoliates and regenerates. Sun exposure, skin type, and how well you protect and care for your scalp all play a role in how long the results last. Clients with oilier skin types or those who spend significant time outdoors without sun protection may find that their pigment fades more quickly. A periodic refresh session, typically a single appointment, is usually all that’s needed to restore the original vibrancy and definition. Many of my long-term clients treat it the same way they would any other grooming maintenance.
